The rocket engine attached to Bluesky’s still youthful spine is taking it into the social media stratosphere, but it’s also leaving Bluesky with little time to prepare and adjust.
In recent weeks, the platform’s been plagued by outages, content moderation issues, and, especially, imposter syndrome.
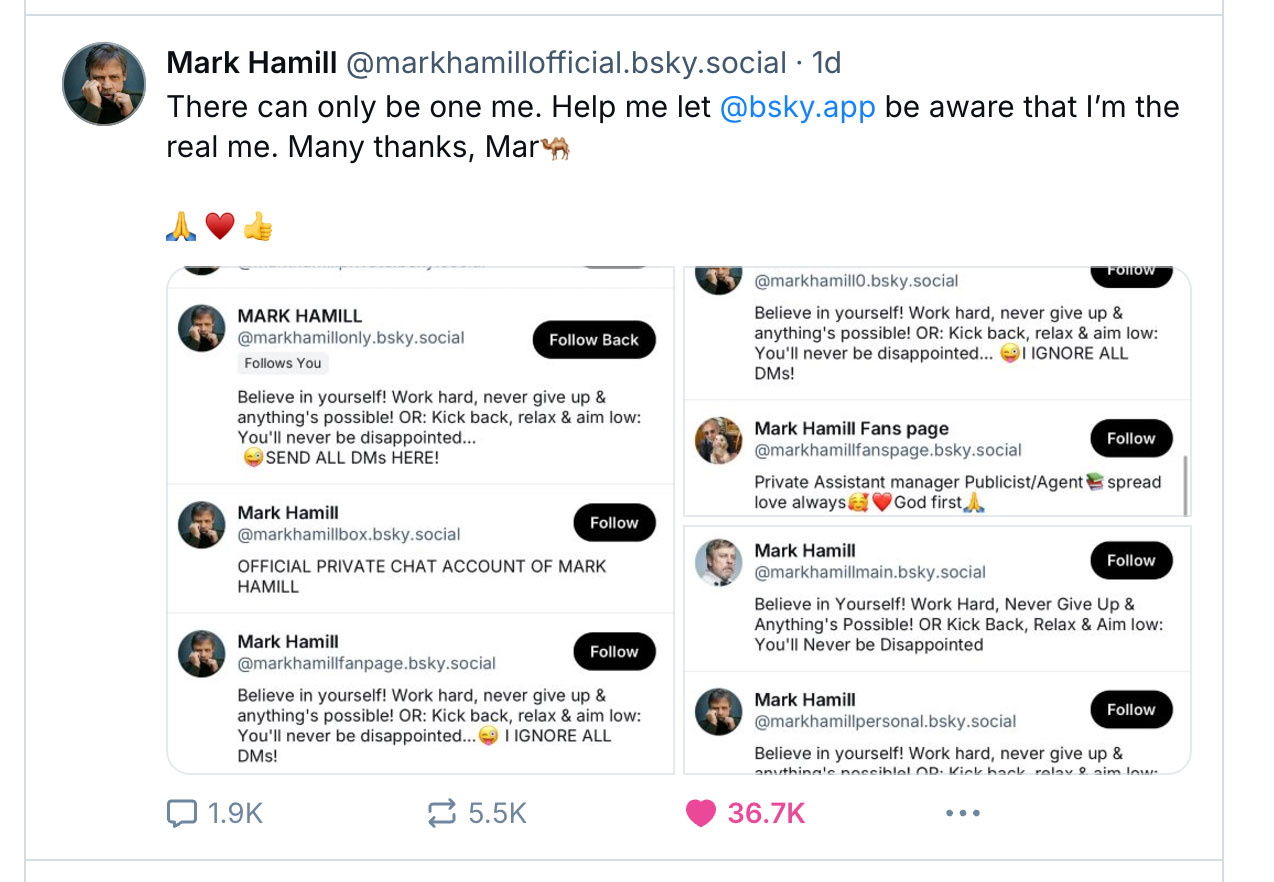
Bluesky has no formal verification process, and as a result, celebrities and other notable users are confronting growing legions of imposter accounts. Star Wars actor Mark Hamil joined the 22M or so existing Bluesky accounts a week ago and quickly found no fewer than half a dozen fake “Mark Hamill” accounts.
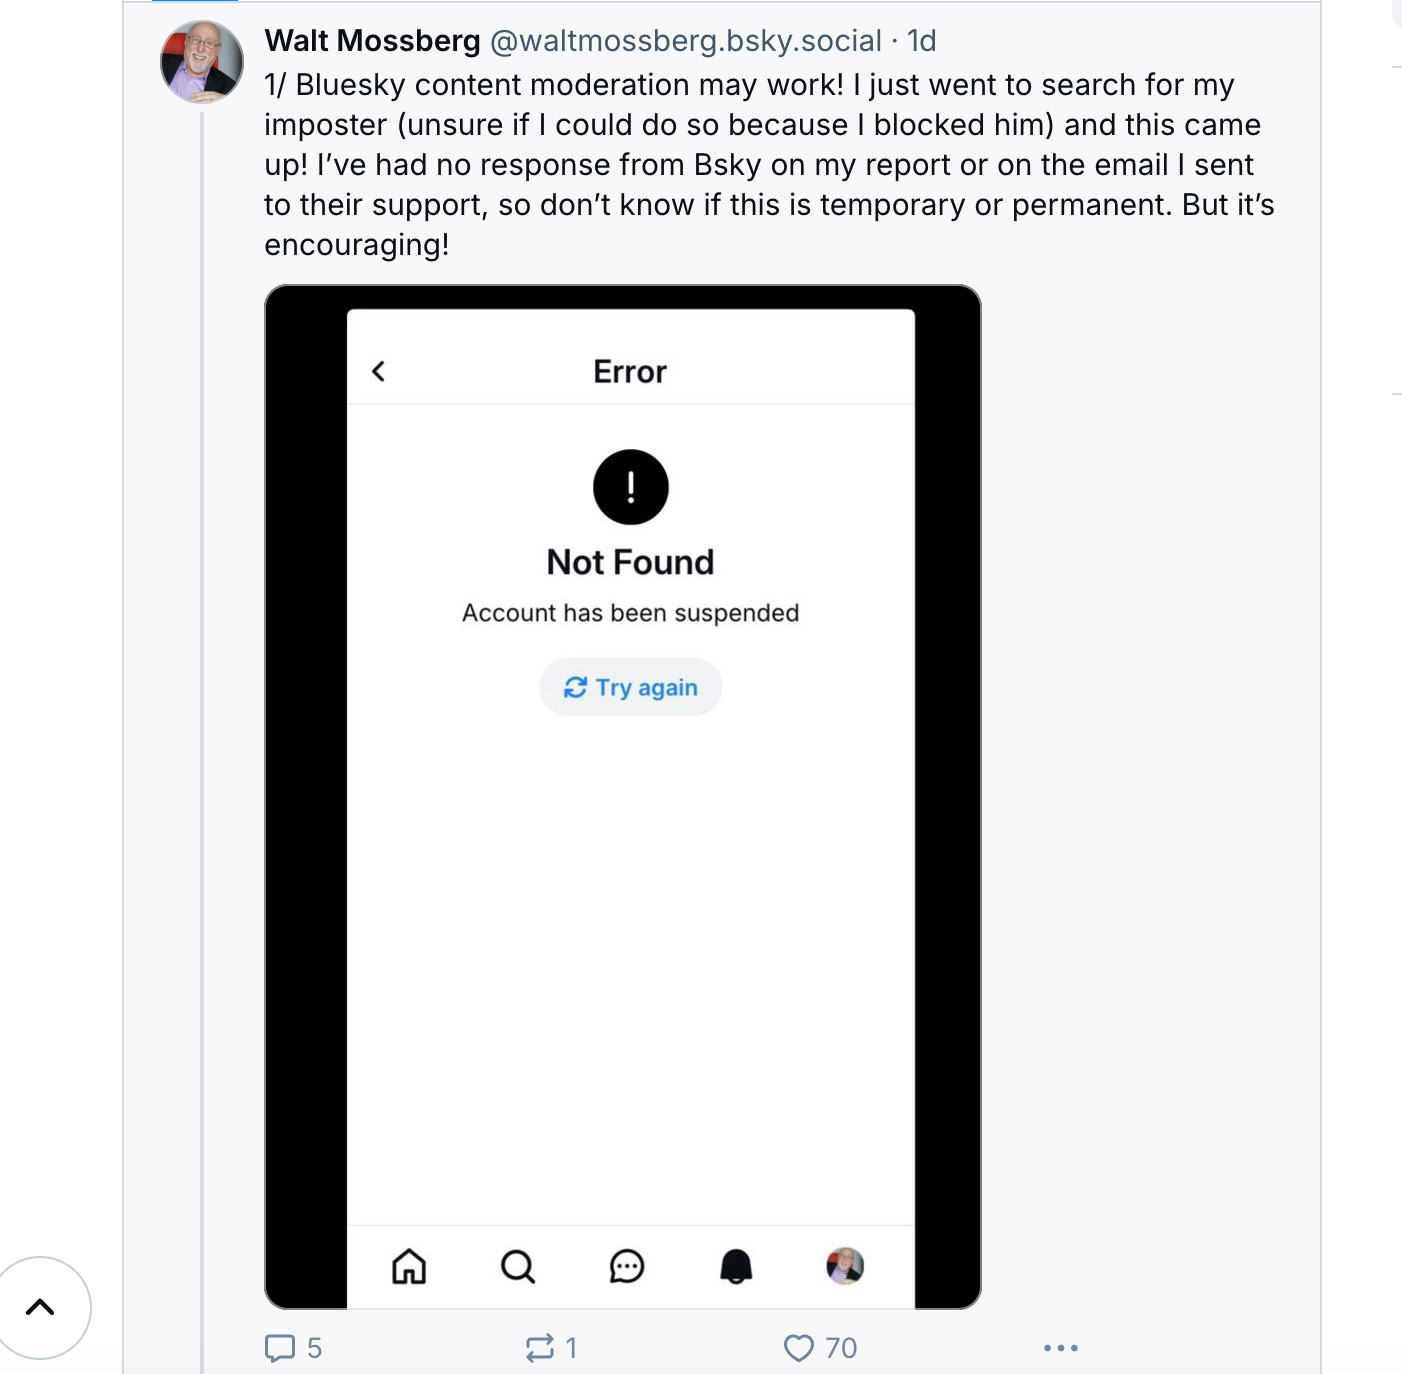
Retired Personal Technology columnist Walt Mossberg reported his imposter to Bluesky and may have gotten some relief. Popstar Lizzo gave up on trying to own her unadorned handle on Bluesky and is now “@lizzobeeating.bsky.social” with this note attached to her header: “THIS IS MY ONLY PAGE ON BLUESKY – ANYONE ELSE IS A FAKE PAGE!”
As a distributed platform, one where Bluesky does not own our identities, these can float freely between social media platforms that use the AT Protocol. That being said, Bluesky likely isn’t interested in introducing an antiquated verified badge system similar to one found on X or adding the infrastructure needed to support identity verification.
It might seem that people whose names are brands might have no recourse for protecting their identities on Bluesky, but that’s not the case. There is a way to confirm your identity; you just need your own domain.
The idea here is to connect your Bluesky account, handle, and identity to an existing domain you own. So, TechRadar owns “TechRadar.com” and would want its Bluesky handle to represent not just its name, but also the owned and operated domain.
Naturally, not everyone owns their own domain, but then people whose identities are less likely to be faked or compromised on social media might care less about this. If you have any online, news, or pop culture profile, though your name is a kind of currency and fake accounts undermine and devalue it. Having a website in your name, a.k.a a domain, is one way of protecting that identity.
How to connect you Bluesky account to your domain
1. Get a domain
If you do not already have a domain in your name (“fullname.com”), now is a good time to get one. Some services like GoDaddy, Wix, Squarespace, Turbify, and others can help you quickly acquire and set up one. Usually, the domain costs you $10-to-$15 a year for the first year or so, and then it could rise to $34-to-$45 a year, depending on the services you attach to the domain.
This process will be a little easier if you already have a domain.
Yes, I have a domain, “lanceulanoff.com,” one I set up when I was between jobs, and which I figured would be a good way to introduce myself, especially since I no longer carry business cards. Unsurprisingly, no one has tried to impersonate me on Bluesky, but I figured I’d be a good test case for switching from a Bluesky account with lance.ulanoff.bsky.social into just “lanceulanoff.com.”
2. Open Bluesky settings
I started by opening Bluesky account settings, which live on the lefthand side of the desktop interface (I found it much easier to do this on a larger desktop display and interface than on the cramped mobile app).
A couple of other notes before we dig in, though:
- I’ve blurred out my personal information and the actual DNS entries
- I grabbed most of these images after completing my Bluesky handle domain switchover, but they still accurately capture all the steps.
- This is a complicated process, but it should cause no harm to your domain or Bluesky account
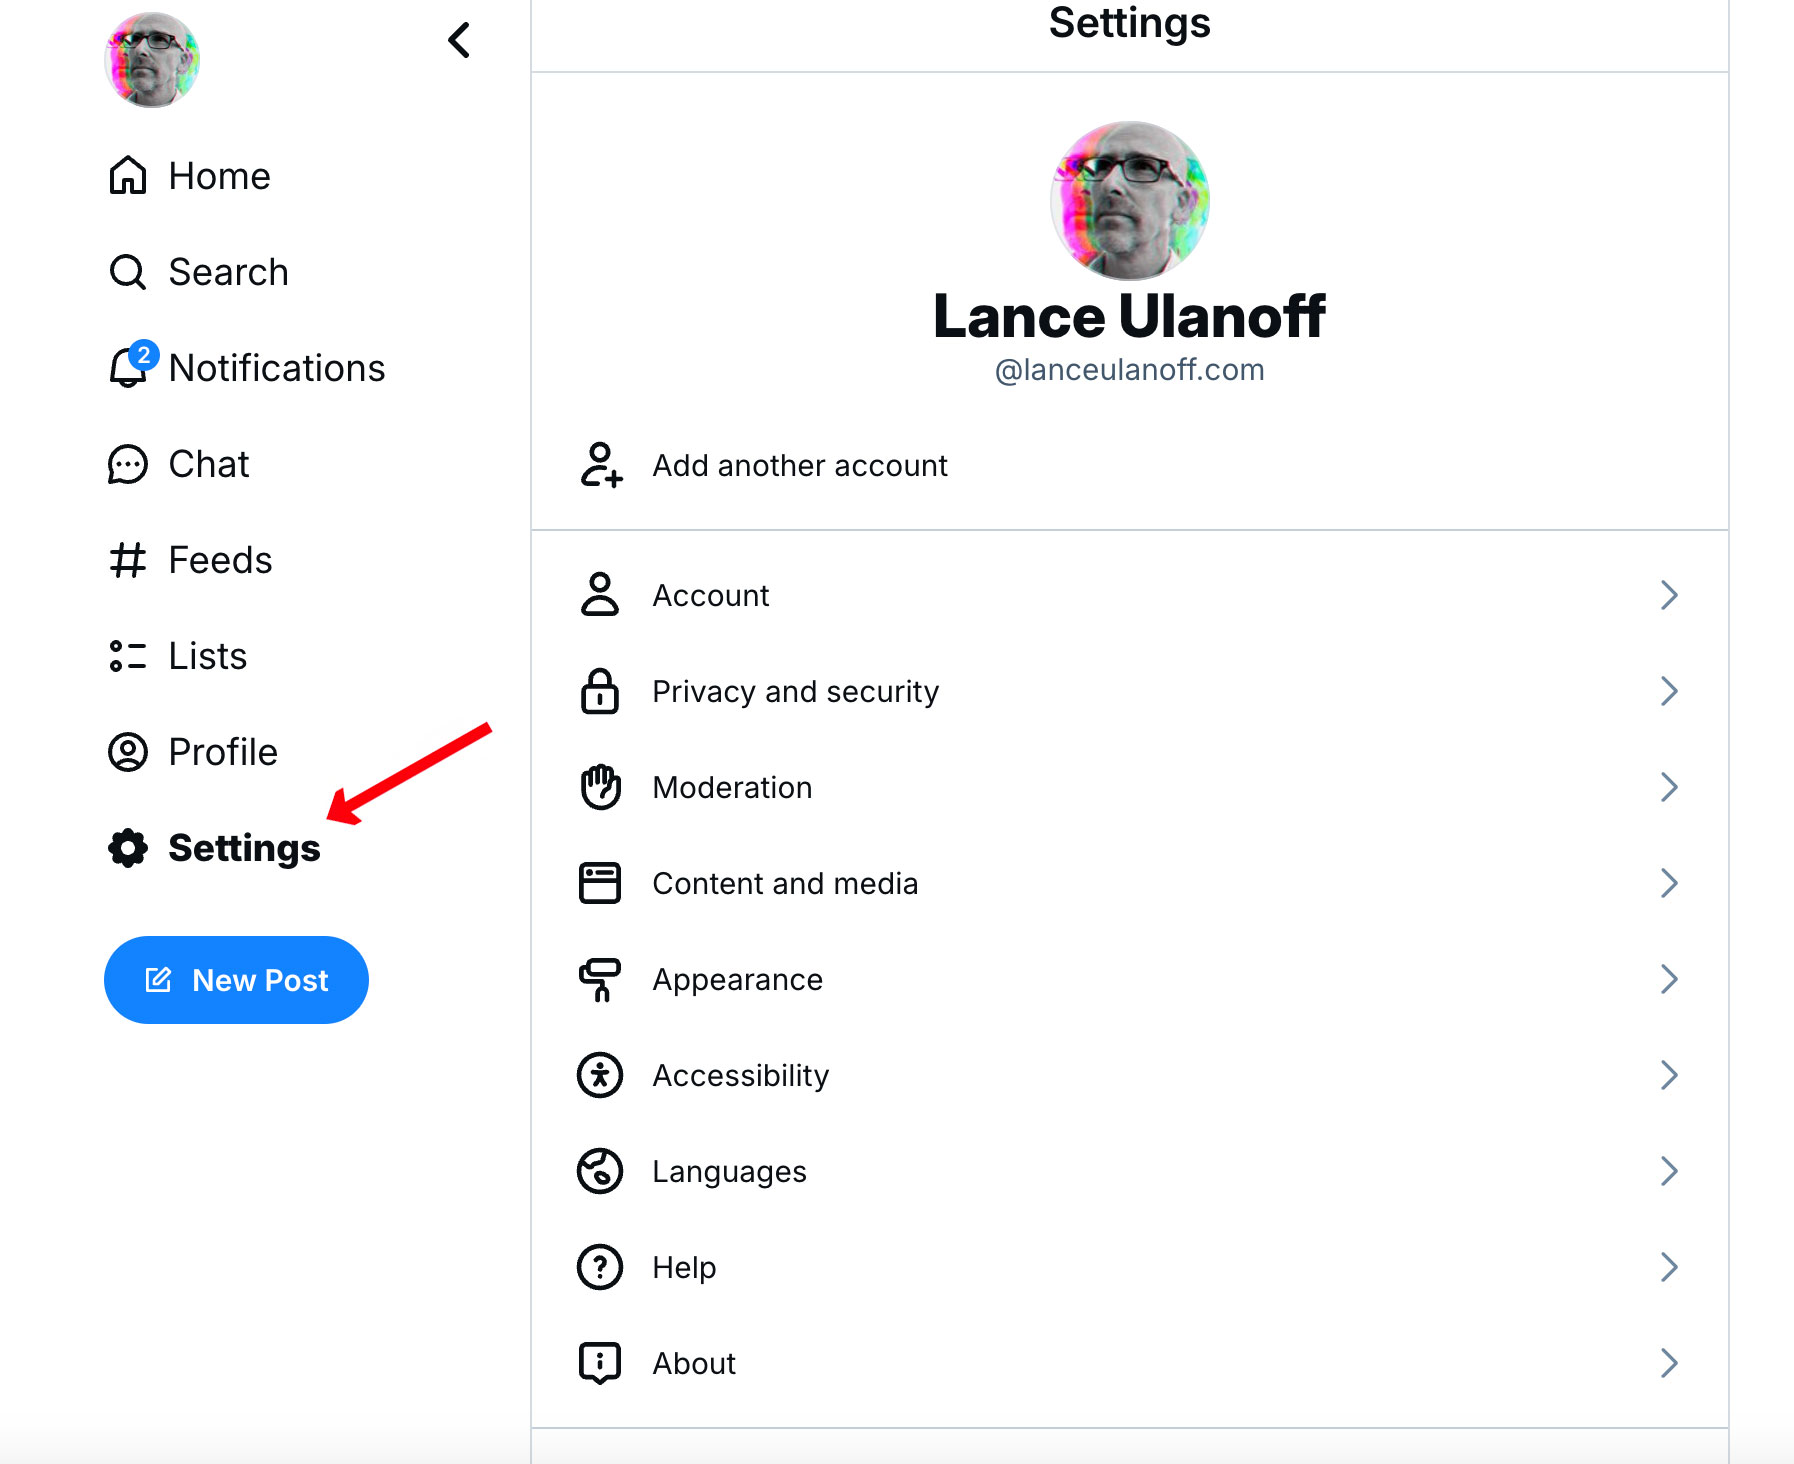
3. Open your account
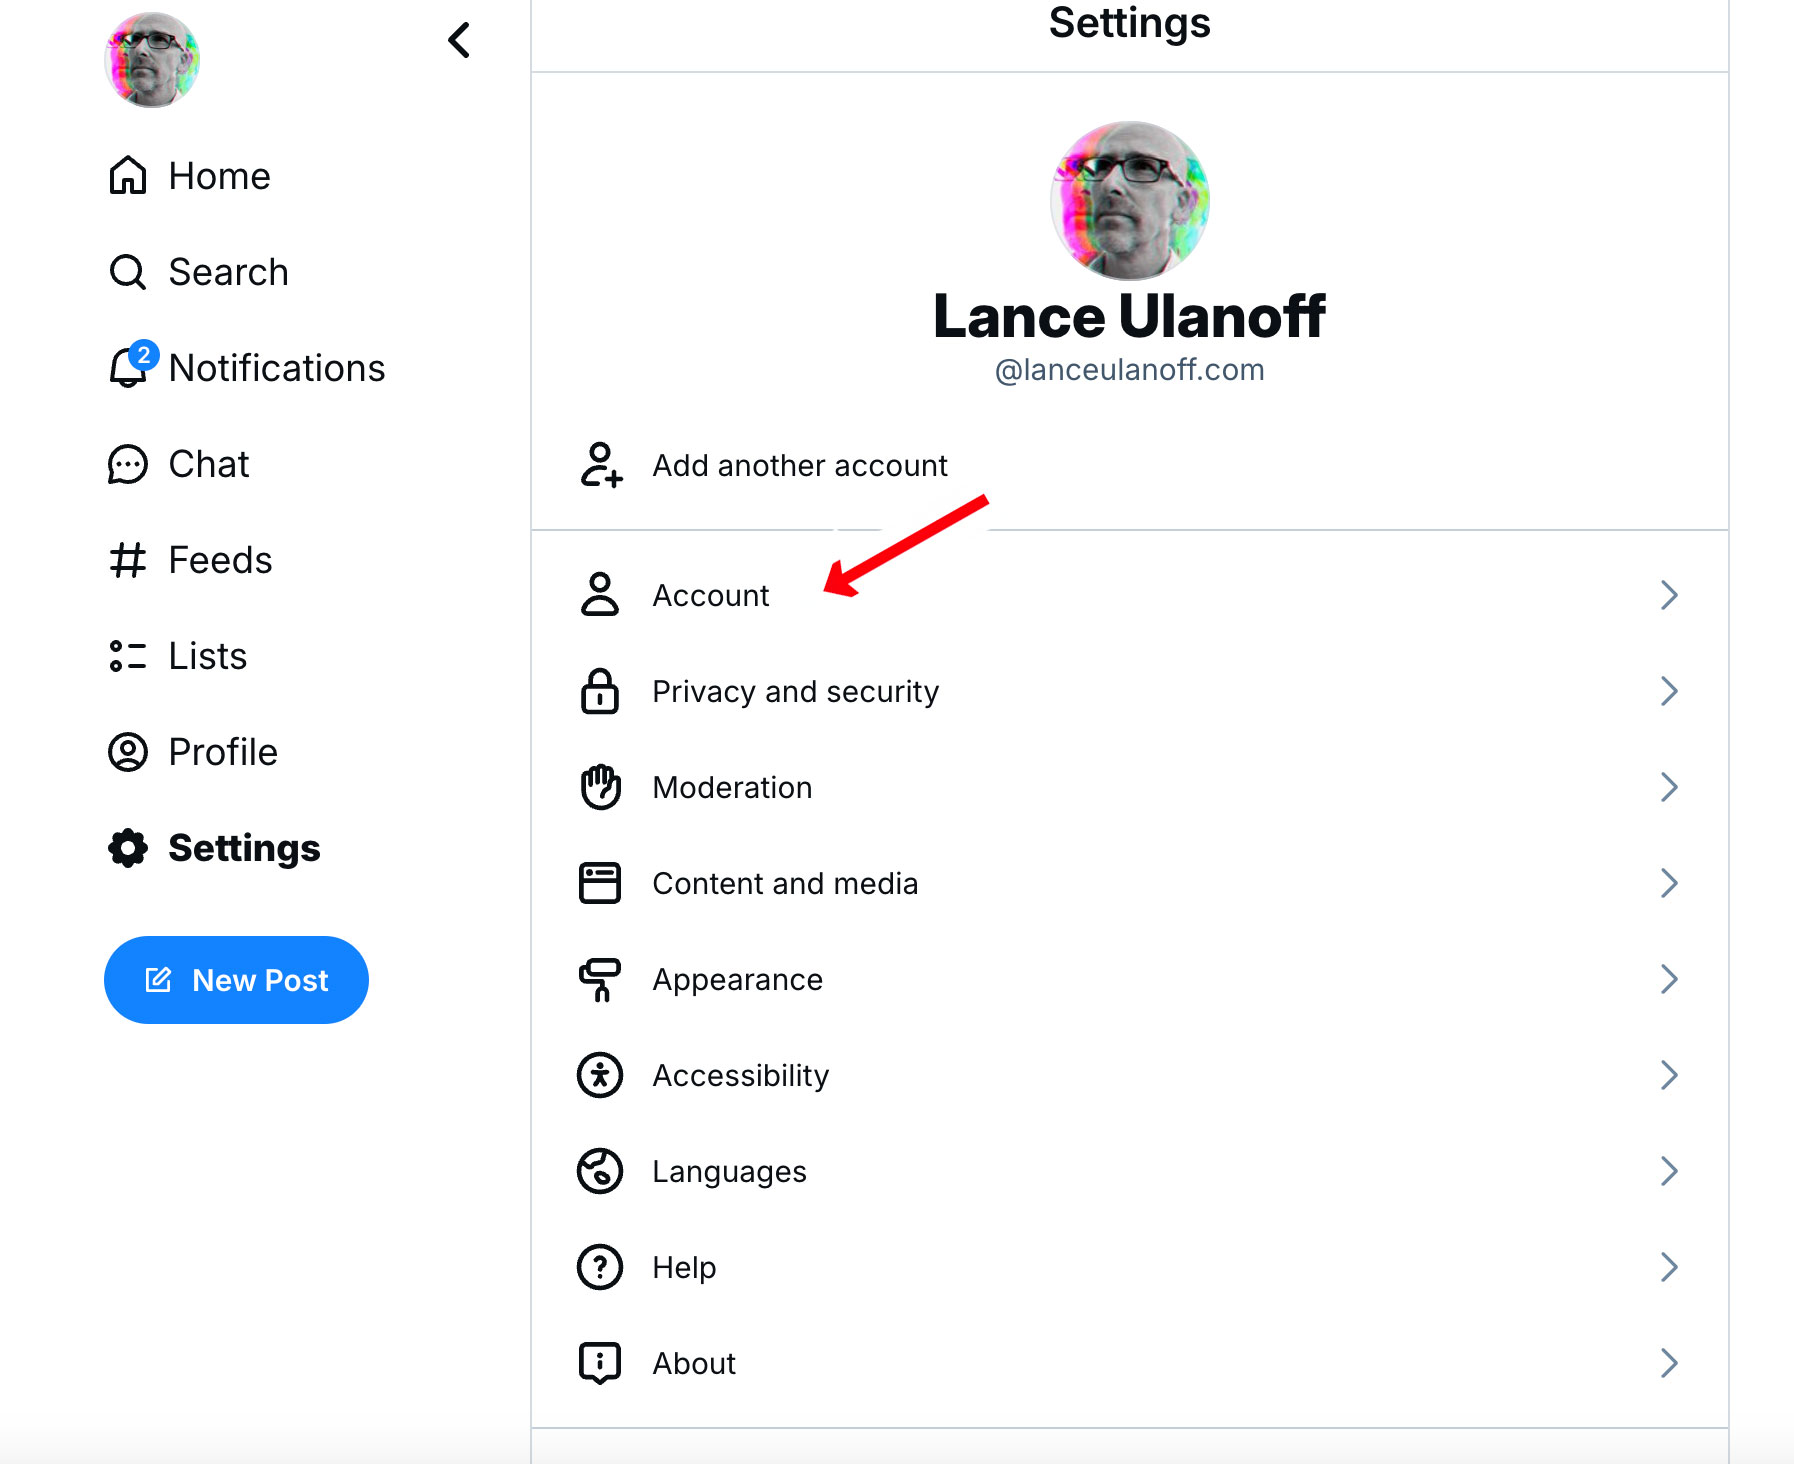
One of the best things about Bluesky is its simple and easy-to-navigate interface. You should have no difficulty finding your account details, which are located at the top of your settings window.
4. Access your Bluesky Handle
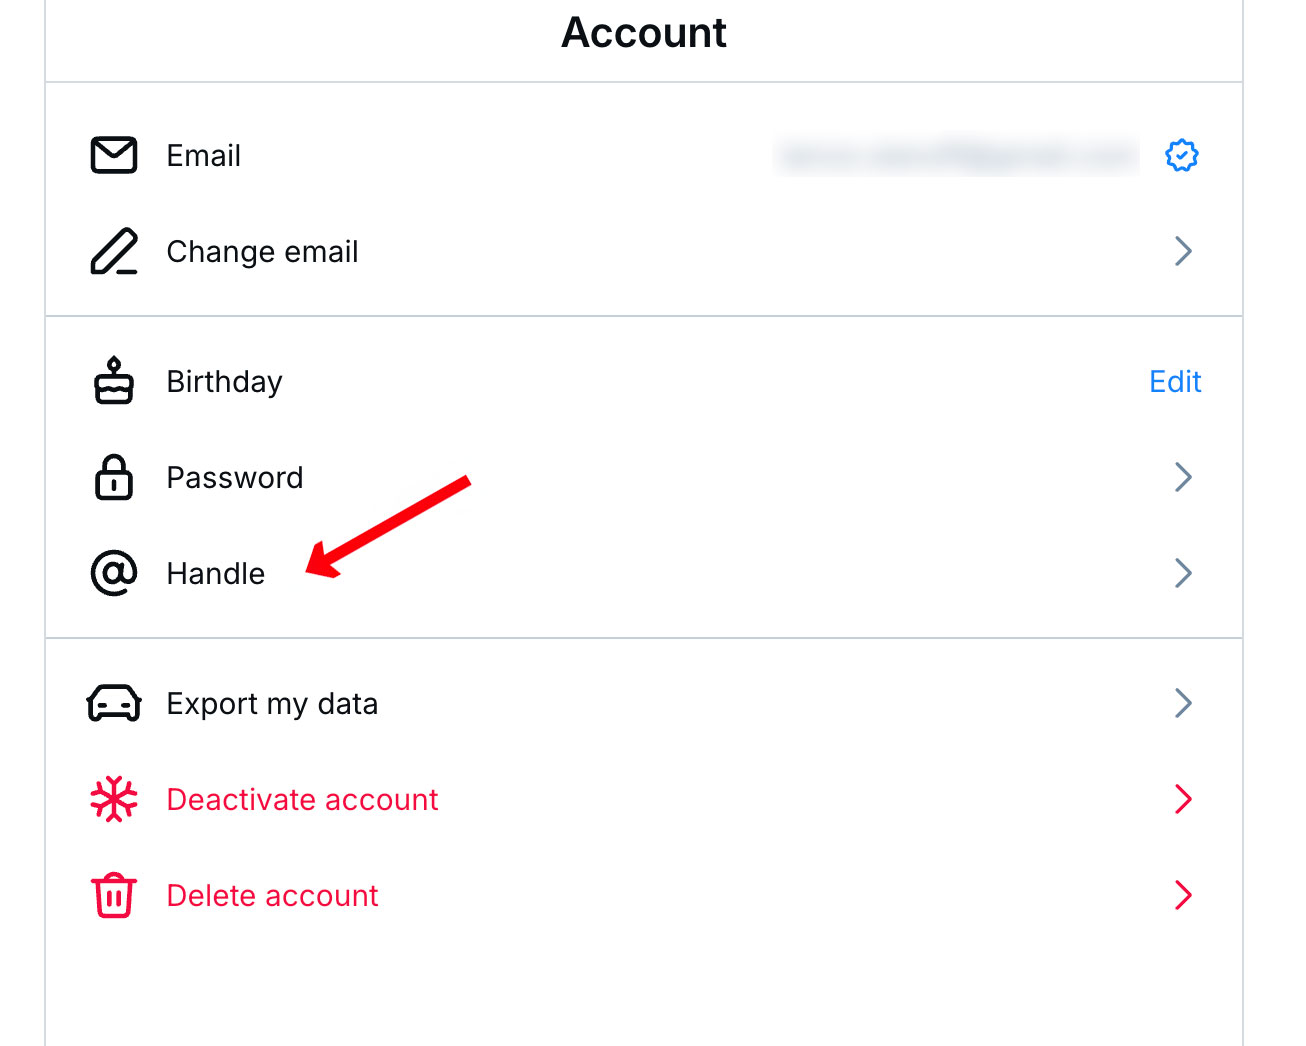
Then scroll down to your handle and open it. While your account name on the platform might be your name (or something else you chose), your location in the Bluesky system is based on your handle. For most people, it includes “.bsky.social”.
5. Select ‘I have my own domain’
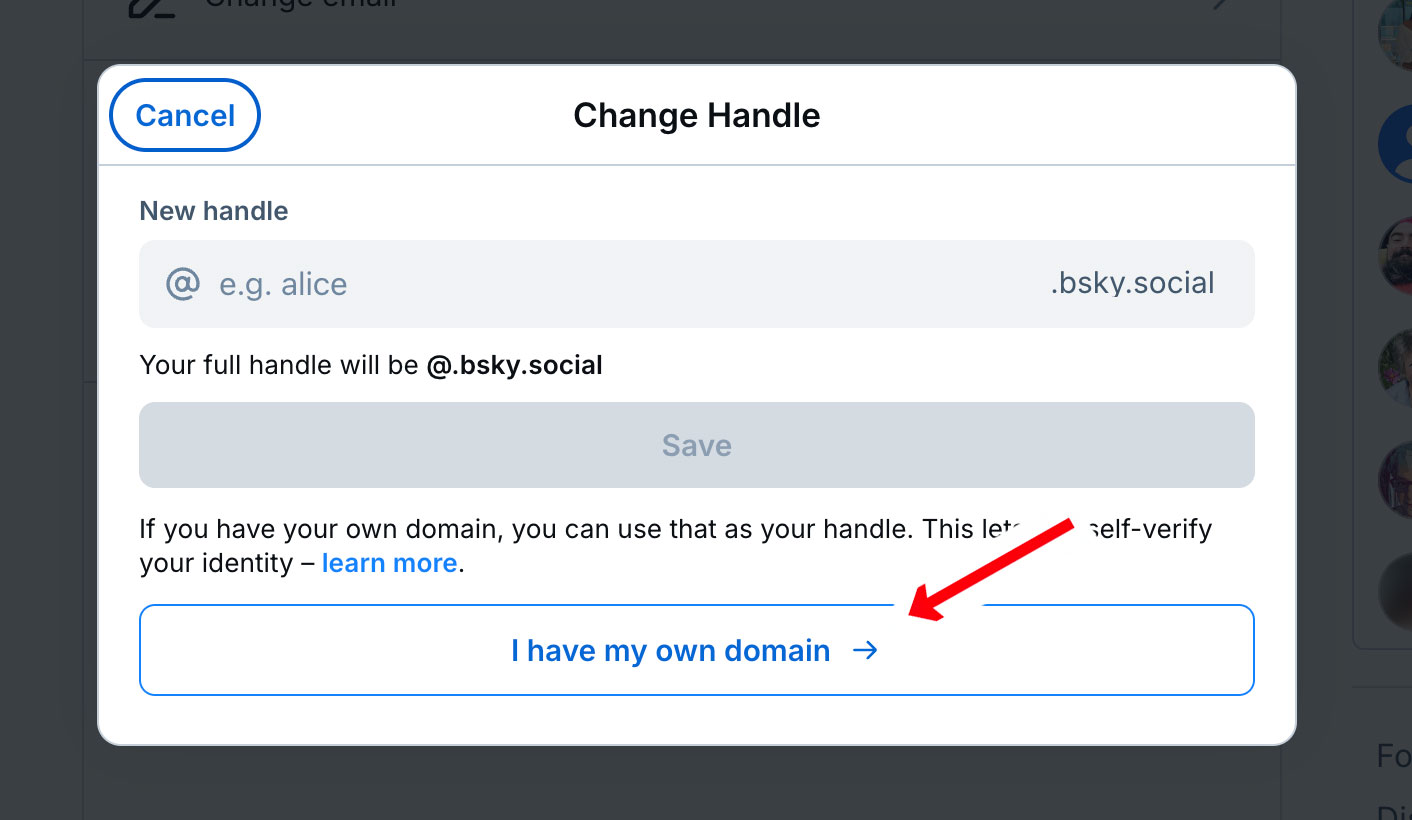
This will open the change handle window. Select the large “I have my own domain” button – assuming you have one. If not, return to step 1.
6. Access Change Handle Panel and create a domain handle name
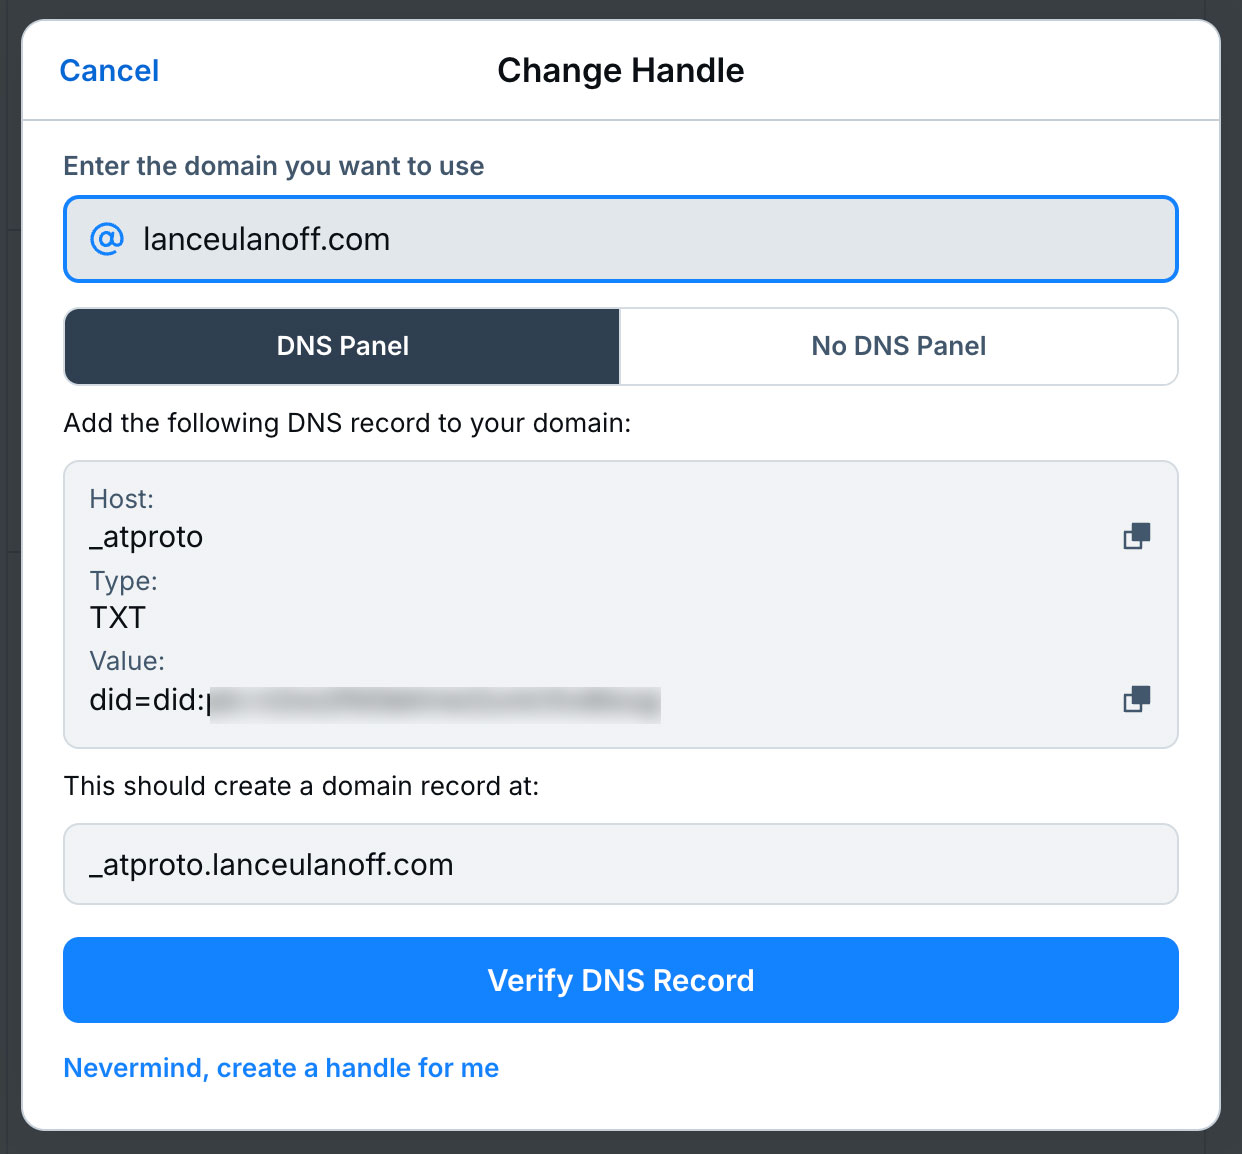
In this window, you’ll enter the name of your domain at the top. Note that you do not include “https://www.” In my case, I entered “lanceulanoff.com”
7. Copy DNS entry info
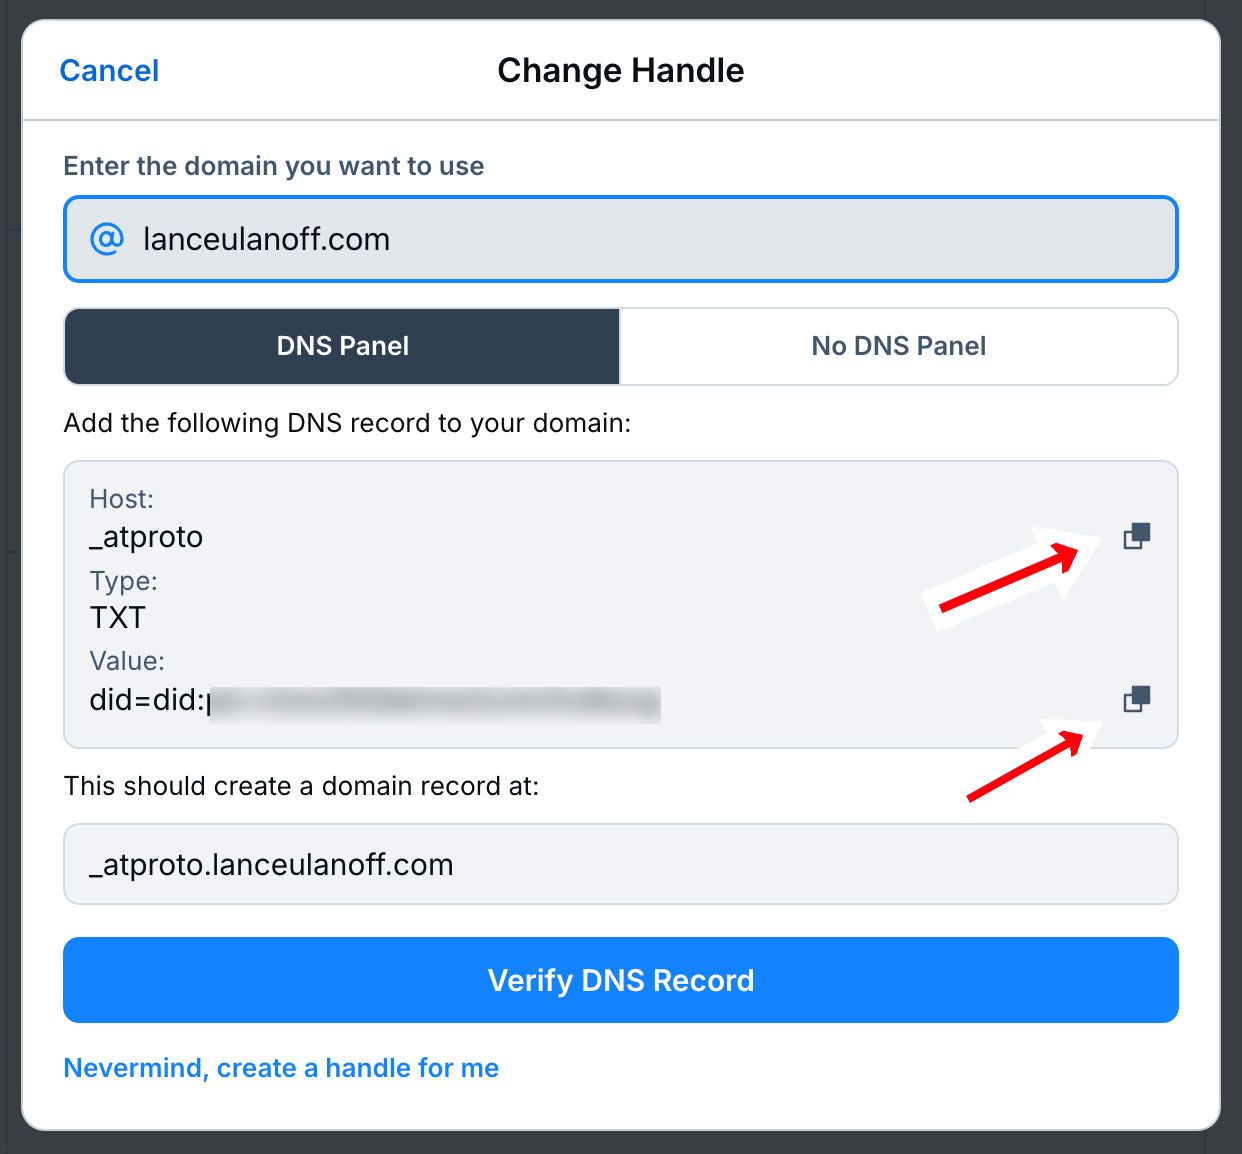
Bluesky automatically creates the DNS entries you’ll need for the DNS panel on your domain provider. You select each one, copy it, and then paste it into the corresponding field on your Domain Management’s DNS entry page.
8. Open DNS controls under Domain settings at your domain provider

My current domain provider is Turbify. Your provider may have a slightly different interface but DNS is a standardized system. Here, I selected the “add entry” button in the “TXT” DNS entry type section to create a new DNS entry.
9. Paste info into DNS entry sections
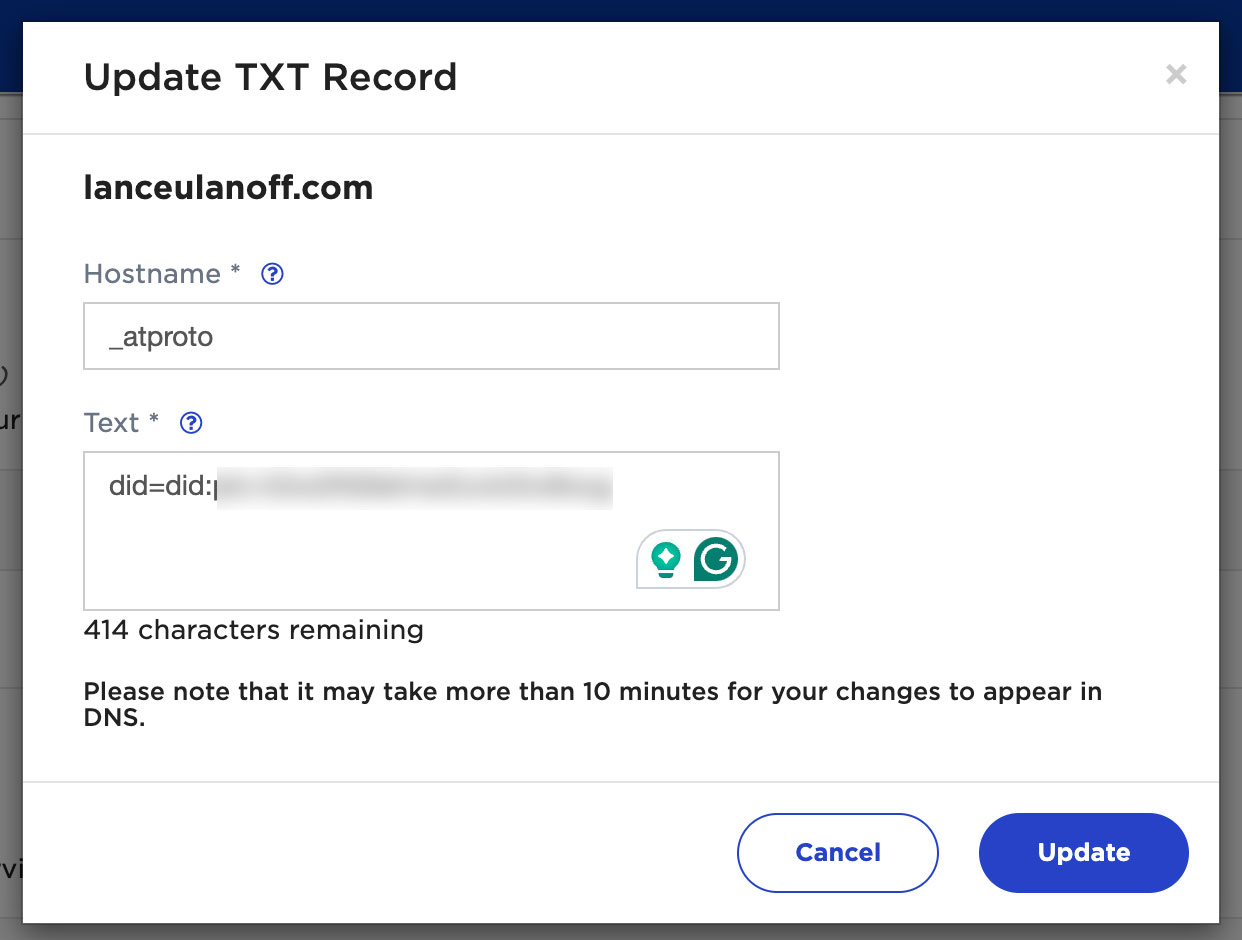
You’ll be pasting the Host info into the “Host Name,” which will be “_atproto,” and the “Value” that’s unique to your Bluesky handle in the DNS “Text” field.
You’ll save that entry and then return to the Bluesky Handle interface.
10. Verify DNS record on Bluesky
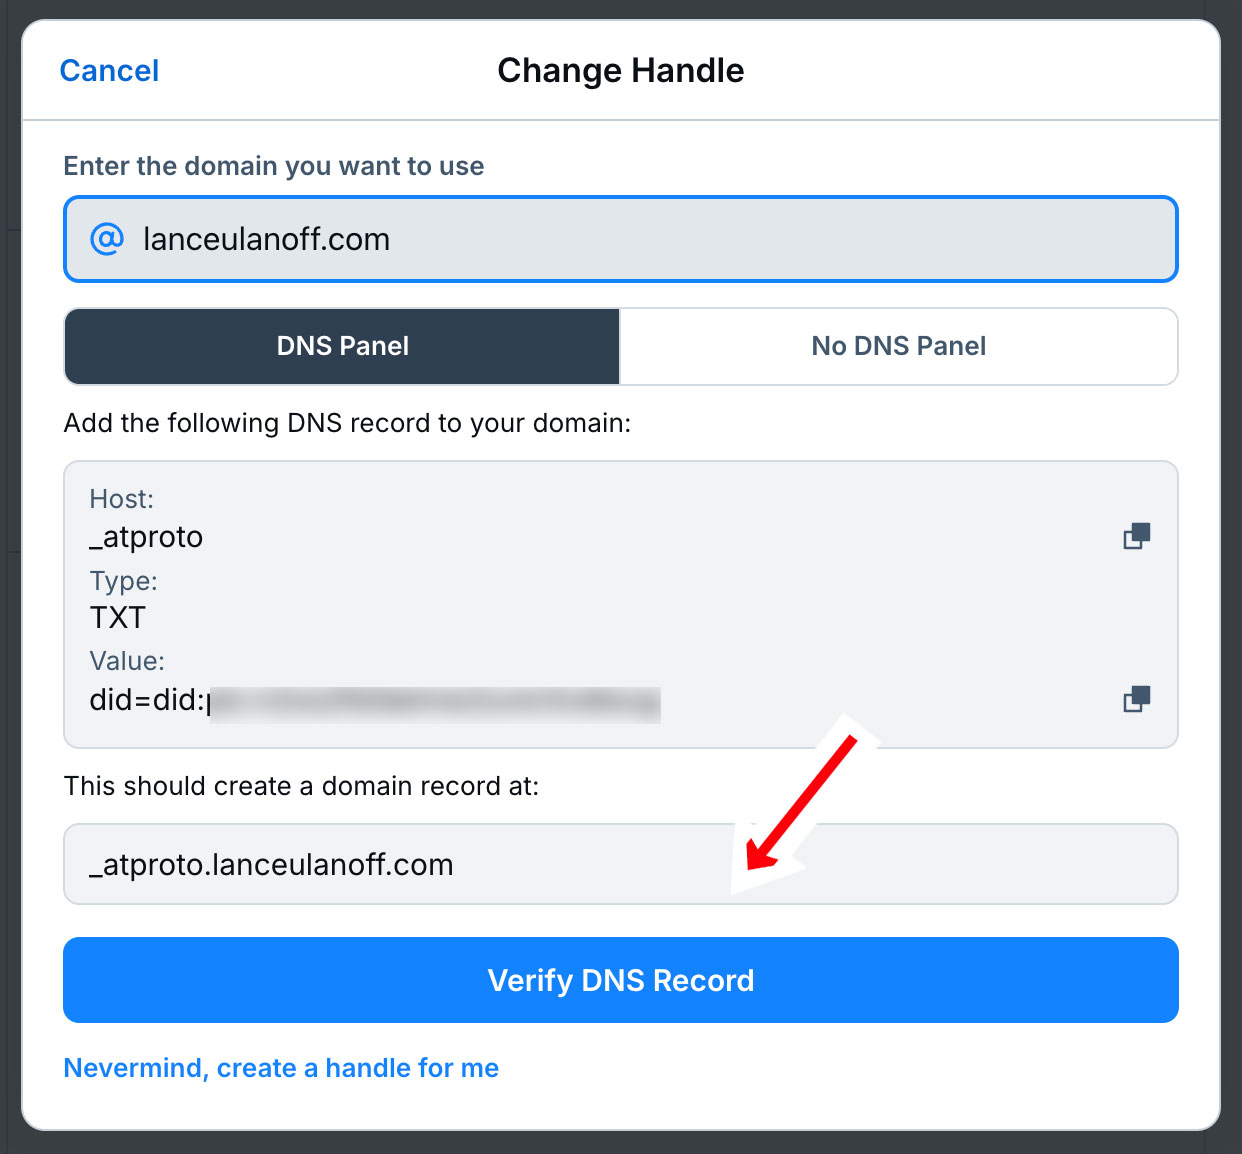
There is a large “Verify DNS Record” button here that you can hit to verify the DNS entry on your domain and enable your new Bluesky handle. Don’t hit it right away, though.
The Domain update can take as much as a day to propagate. Yes, you can try and it may work right away, but you might also find that it initially fails. If that’s the case, wait a bit, and you should have success and a new handle.

It’s not an obvious or simple system, but it is, for now, the best way to verify that you are on Bluesky. I know I feel a little more secure with my new domain handle. I bet Mark Hamill would feel the same.


